

So the response was so great to the Fat Quarter Skirts that I thought I”d write up the “tutorial.” I’m using the sarcastic air quotes there because I'm not nearly adept enough at the sewing thing to be telling other people how to do anything. There’s probably a million better ways to do this but here’s what I did:
Materials:
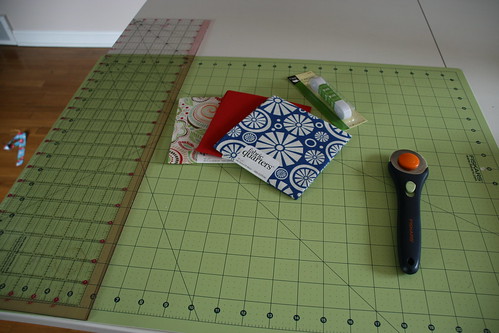
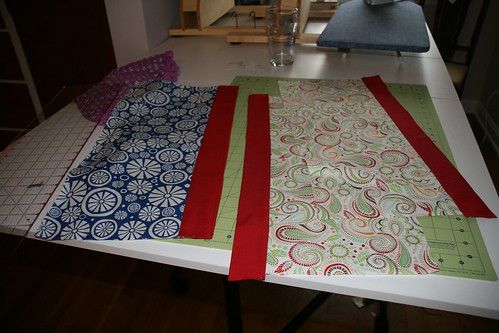
3 fat quarters – 2 for the main part of the skirts and one for the trim.
½ inch elastic
cutting mat, rotary cutter, thread, iron, machine, etc.
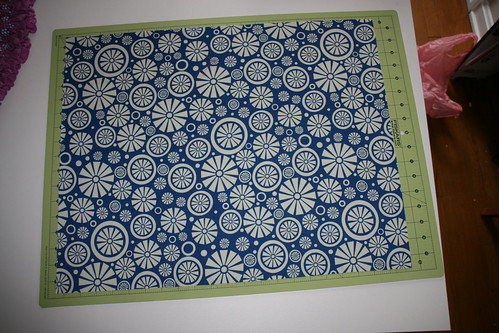
Step 1: Iron the fat quarters. Because that’s what my grandma would want me to do.
Step 2: Take your first Main Color fat quarter and trim it so it's straight. This step might be unnecessary but I’m kindof OCD. Also I don’t trust my sewing skills. I figure if I start with something perfectly straight then I’ll end up with a skirt that’s straight.
Cut it in half lengthwise.
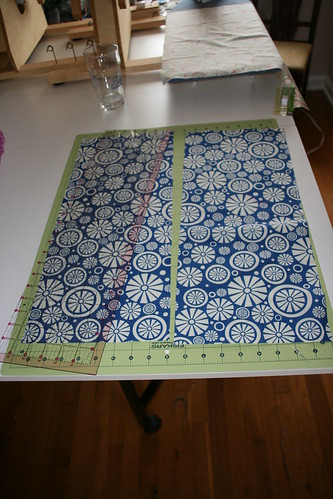
It doesn’t really matter what size these pieces end up exactly as long as they are the same. Mine were 9” x 22” Repeat for the other Main Color.

Step 3. Repeat Step 2 for the Trim Color then cut those pieces in half lengthwise again:
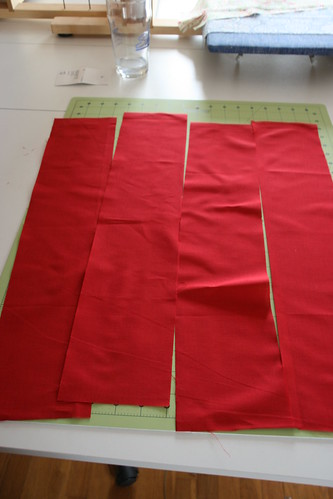
It doesn’t matter what size these pieces are either as long as they are the same. Mine were approx 4.5” x 22”
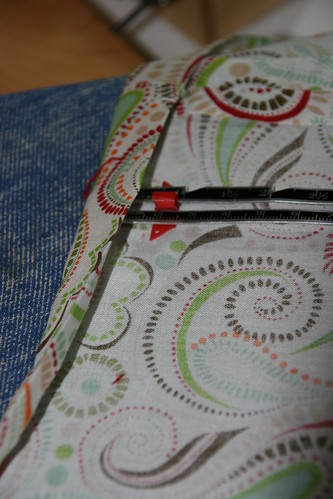
Step 4: Lay your Trim Color down right side up. Then lay your Main Color on top of that also right side up lining up your nice neat edges.
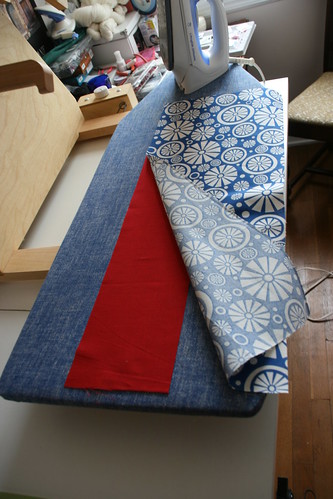
Roll your Main Color into a tube starting at the end furthest away from the trim.
Fold your Trim Color back over the roll, line up the edges and pin in place.
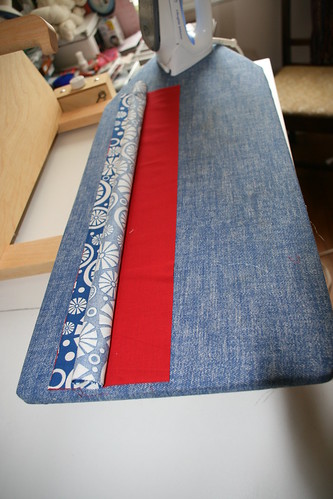
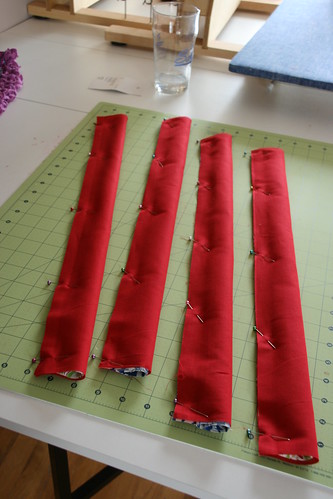
Repeat for the other 3 pieces so that you have 4 neat fabric rolls:
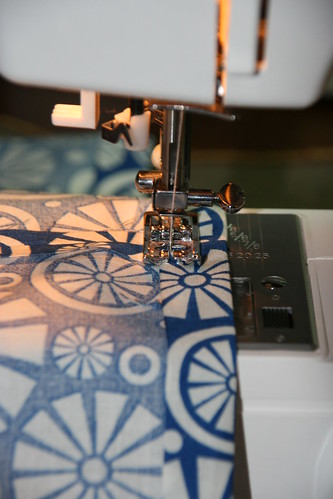
Step 5: Sew across the edge of the rolls.
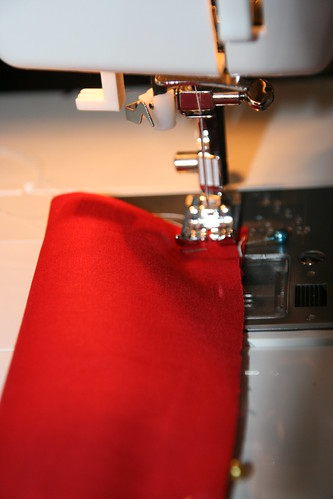
Be careful not to catch the roll in your seam! That is BAD.
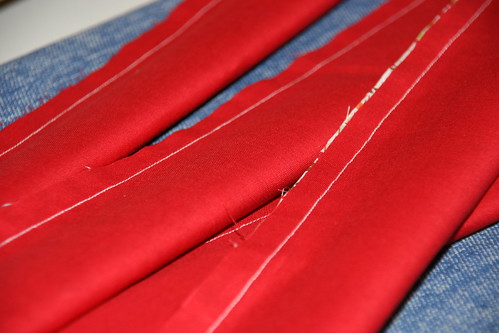
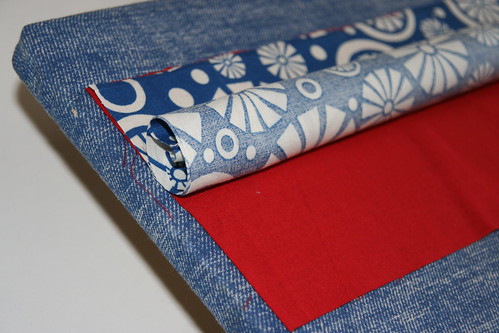
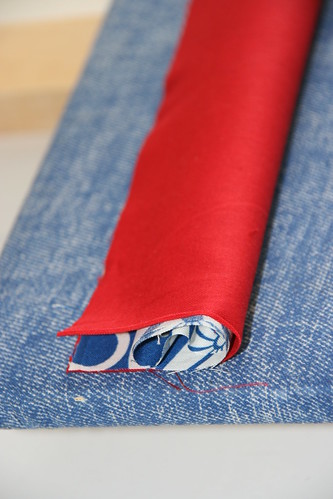
Step 6: Pull the Main Color out from the tube to turn the whole thing right side out.

Pull the bottom band straight and press it into place. You will top stitch this later.
Step 7: Pin your pieces wrong sides together, sew side seams, and press seams flat:

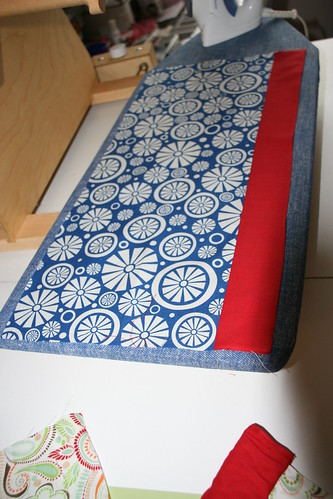
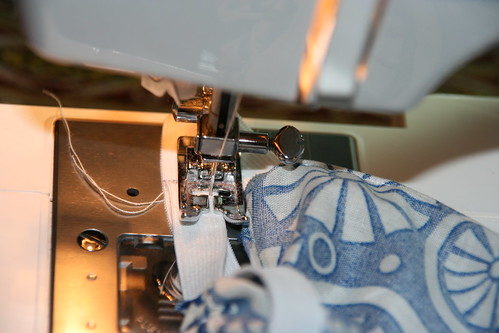
Step 8: Press down the top edge of the skirts ¼”.

Then press the top edge down ¾” to make casing for the elastic.
Sew the casings in place along the edge leaving a few inches open at the end to thread the elastic through.
Step 10: Thread the elastic through. I used a safety pin to do this.
Step 11: Mark how wide you want the skirts to be. The best way to do this is probably to try it on your kid but mine was sleeping at the time. Plus trying to wrestle a half finished skirt onto her so I could pin it sounded pretty horrifying. Instead I just used a skirt that she already had and made this elastic band the same size:

Step 12: Sew your elastic closed. I overlapped mine and then stitched a square because somewhere in the deep recesses of my brain I remembered that’s how you’re supposed to do it with elastic. I could be wrong. But I think I learned that when I made the Awesome Pants.
Step 13: Stitch the casings closed:

Step 14: Topstitch skirts along the trim:
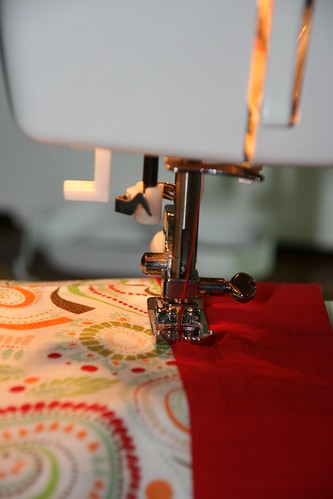
It is probably easier to do this before you put in the elastic but I wanted to use red thread on this part and only wanted to change my bobbin once. I’m kindof lazy like that.
Step 15: Put it on your child and get her to Toddle the Runway for you!

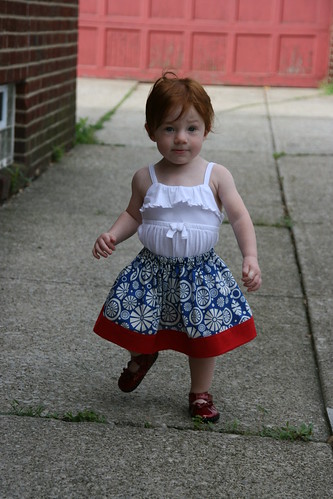
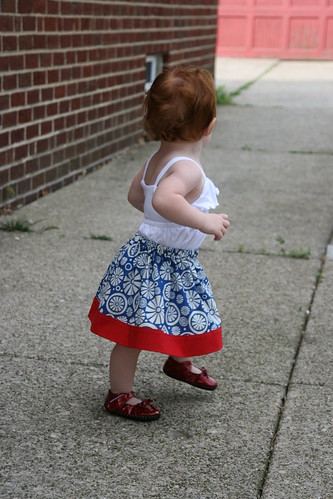

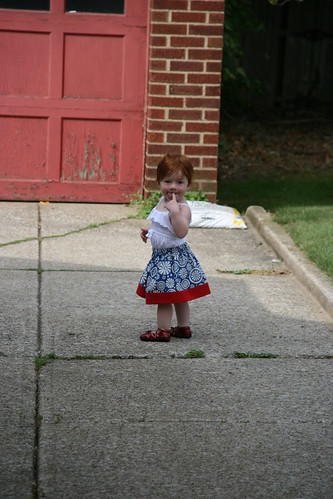
Super cute! If anyone out there actually makes this I’d LOVE to see a picture!!!
oh man - my machine better be fixable - this is exactly what i need to get back into sewing!
ReplyDeletethanks so much for taking the time to put this together, jeanne - can't wait to make some of these for ash!!
Thanks for doing this. I may have to dig out my sewing machine and try this. I have a friend who's having a girl in October (all my friends have boys!) so I finally get to knit/sew girl stuff!
ReplyDeleteThank you for doing this! You know it's going on my list. And look at that girl go! No stopping her now.
ReplyDeleteThose are adorable! I love the red shoes, too!
ReplyDeleteAgain...super cute!
ReplyDeleteLook at you go, Ms. Joann Fabrics! Very cute!! Whatta doll!
ReplyDeleteOh, what a sweet girl you have!!!
ReplyDeleteThanks for the inspiration to get going on a skirt project for my two girls! I used the general concepts that you outlined here to get two completed this afternoon.
ReplyDeleteThanks!
So cute!
ReplyDeleteshould step 7 say pin RIGHT sides together? cuz i just sewed w/ wrong sides pinned together and it doesn't seem right. lemme know. i haven't sewed or followed a pattern in EONS so i might just be reading it wrong.
ReplyDeleteGAH! Yes step 7 should say right sides... sorry, jennifer!
ReplyDeleteI know you've got other things on your mind right now, but I found your blog today while looking for skirts from fat quarters (the very thing!). My finished product isn't quite like yours for various reasons, but I hope you like it. I'll try to link an action pic tomorrow.
ReplyDeleteHah. Forgot the link:
ReplyDeletehttp://www.facebook.com/photo.php?pid=7101550&l=d68d5e8447&id=559461050
Thank you for this! After DAYS of searching for a toddler skirt tutorial that I can understand and that I LIKE the style, I have found it! Thank you! I'll post a pic when I'm done...eventually! LOL
ReplyDelete